In this chapter, you’ll learn how to stake as a validator in the Metal Wallet, what the minimum staking duration is, the minimum staking amount required, how to track your staking rewards, and more.
Step 1: Visit the Metal Wallet website and click on the Access Wallet button to log in to your account. Check the how do I log into my account chapter if you need more guidance.

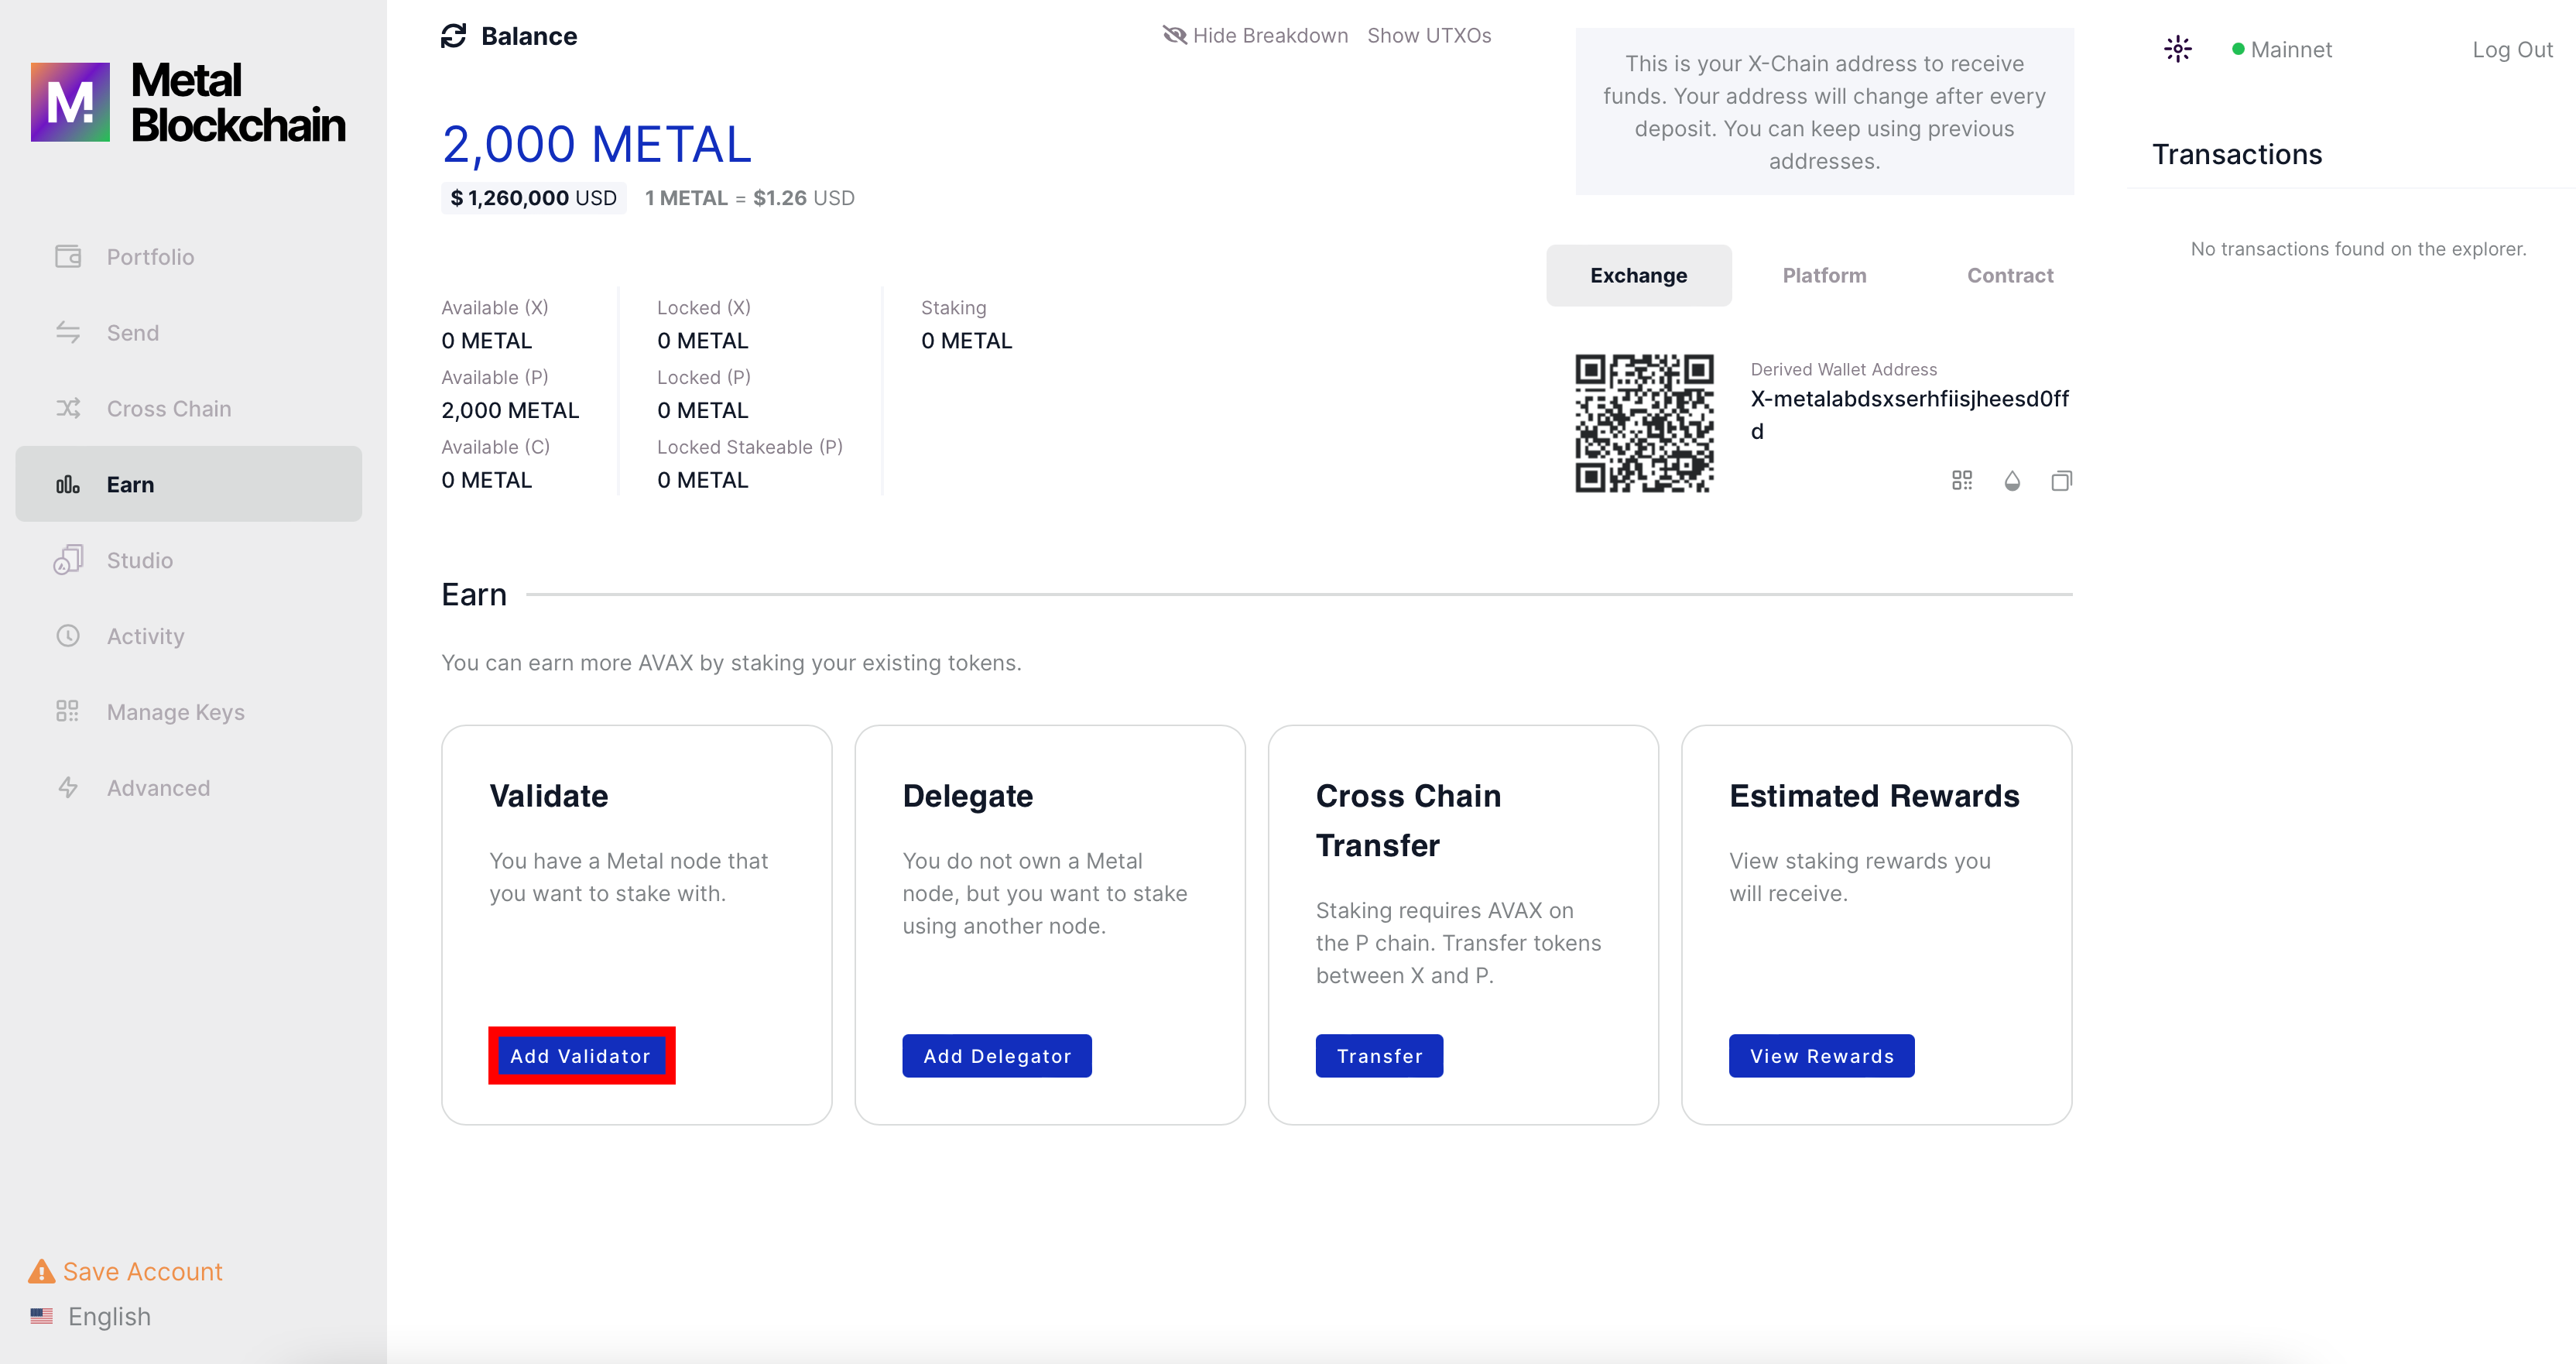
Step 2: Make sure you have at least 2000 METAL available on the P chain and click on the Earn tab on the left menu. If you need to transfer between chains first, check our how-to transfer cross-chain guide.

Step 3: On the Earn page, click on the Add Validator button.

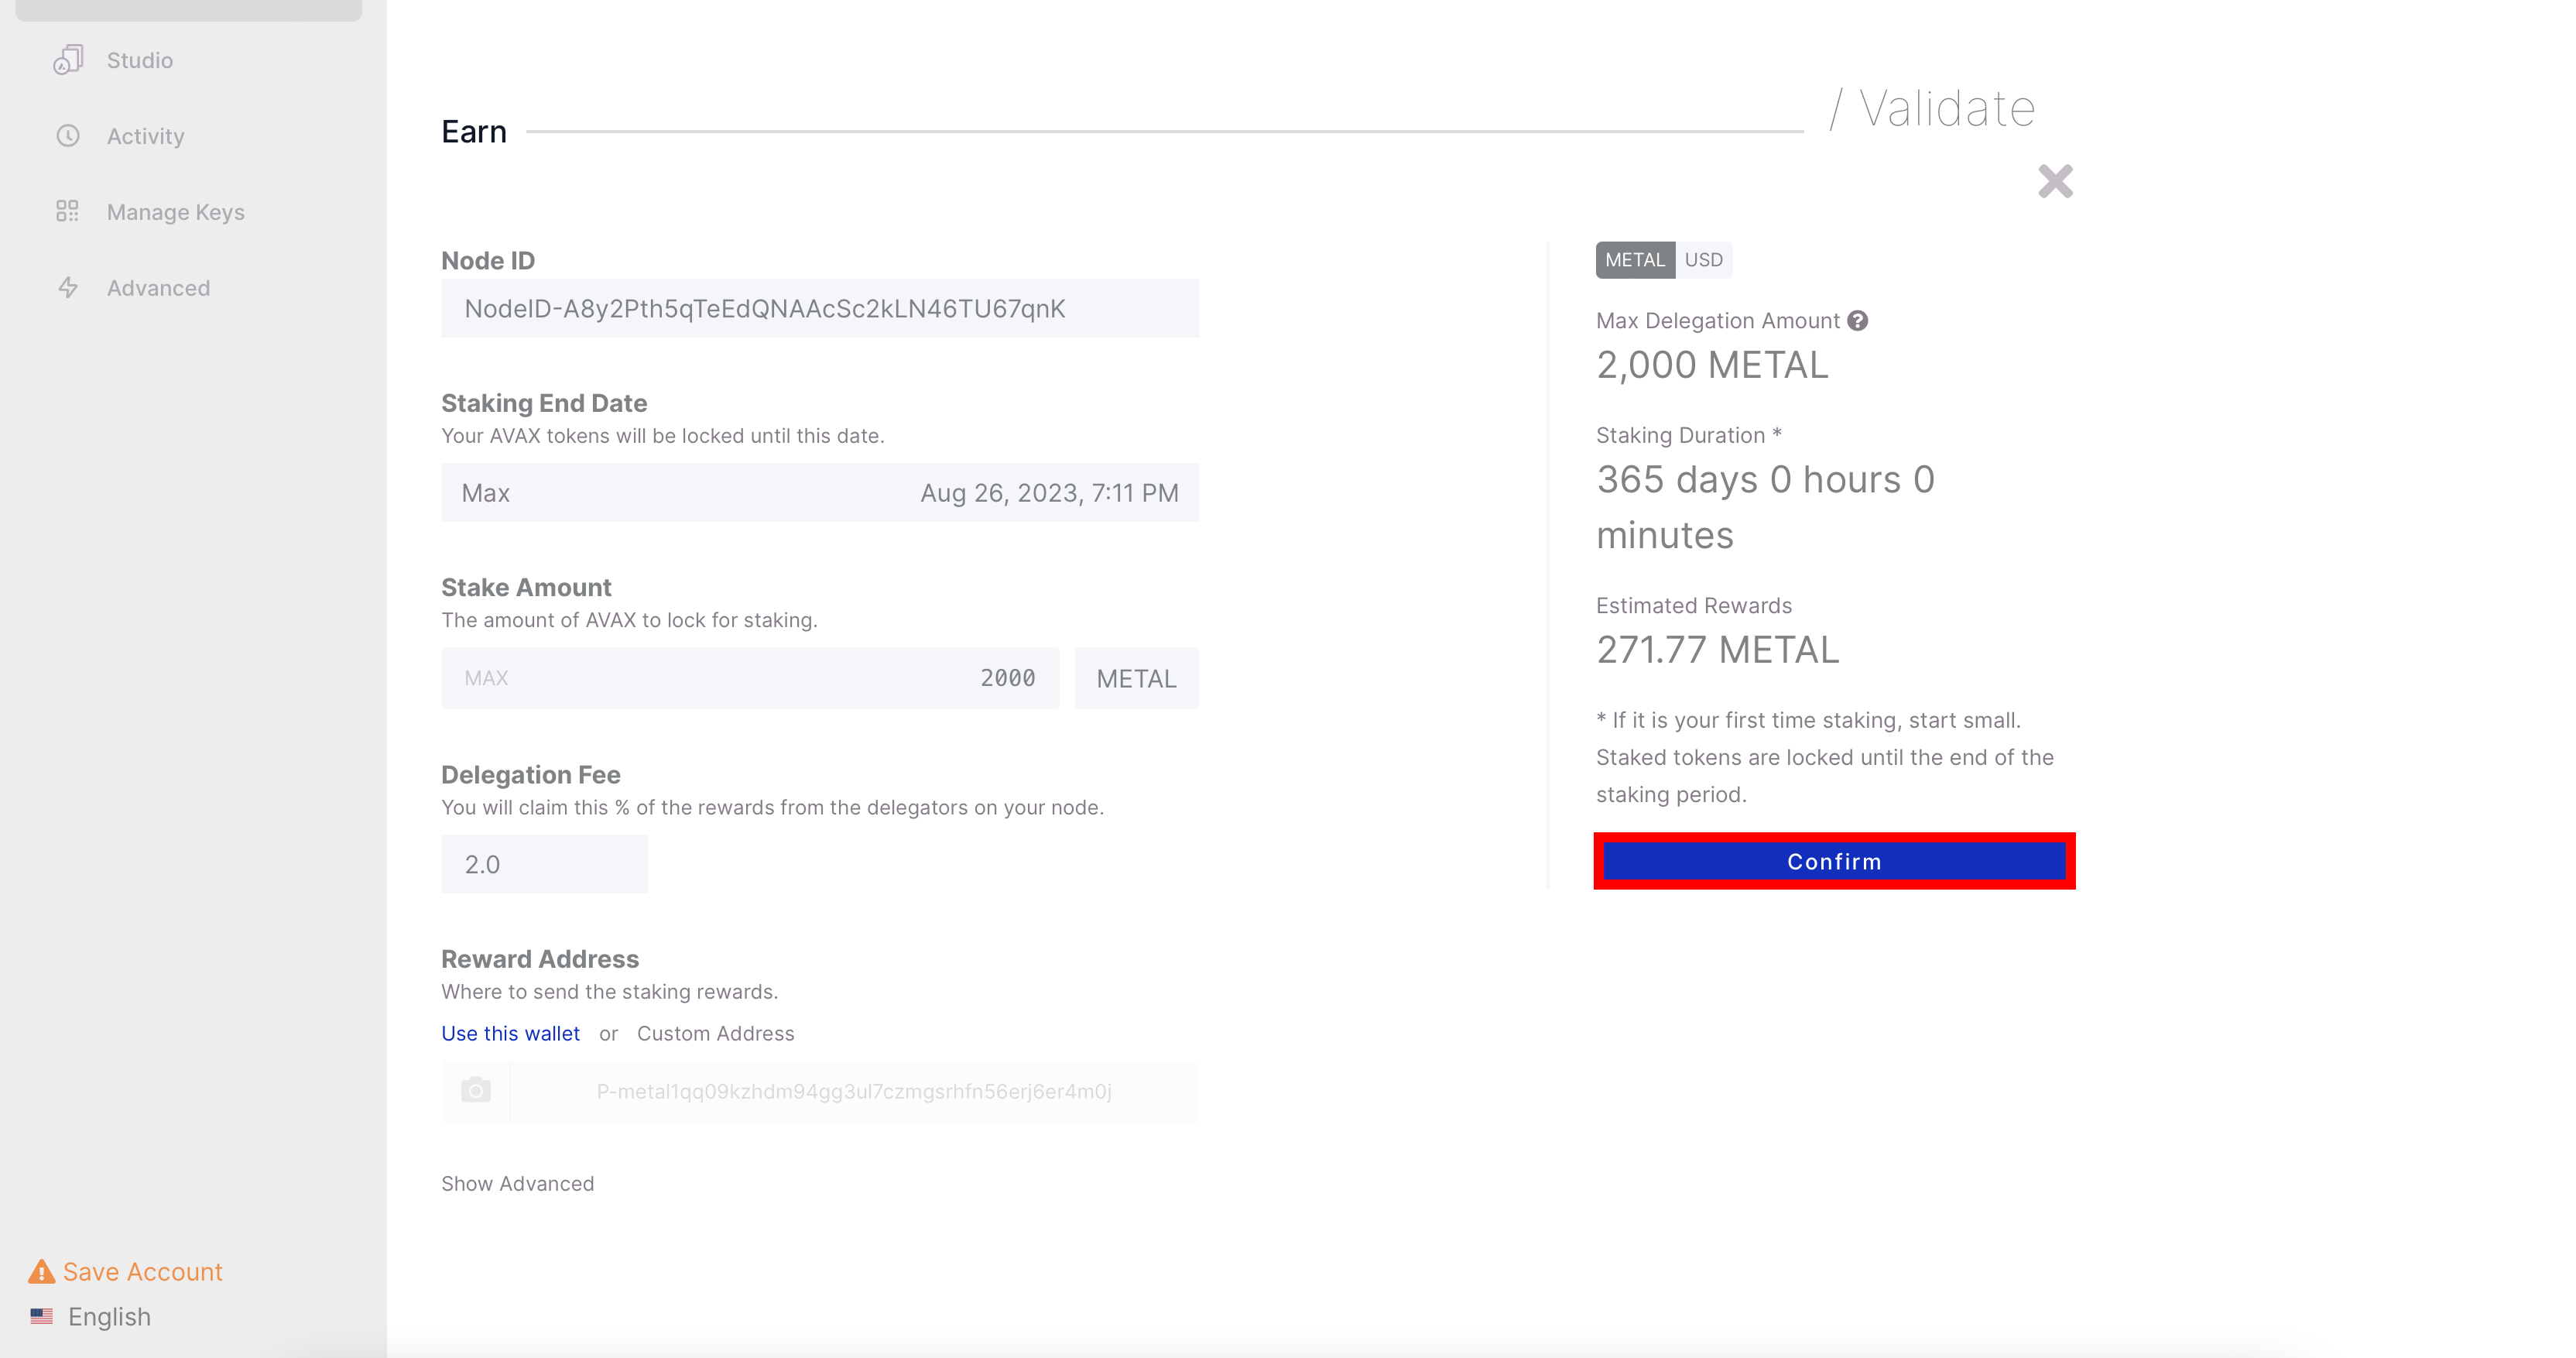
Step 4: Here you will need to enter your personal Node-ID. How to retrieve your Node-ID is covered here.
Since the Durango update, a new section has been introduced: Proof of Possession. In this section, you will be required to input your public BLS key and signature into the designated fields. These can be acquired by executing the following command on your server.
Select your desired end date. The minimum duration is 14 days. The maximum duration is 1 year (365 days). Next, enter the amount you want to stake (2000 METAL minimum).
Important: once you staked, you can not add more METAL to the validator node for the duration that you staked.
Lastly, select the delegator fee and click on the Confirm button.
You will be asked to confirm again, if everything looks ok, click on Confirm again to finalize.

Congratulations, you are now staking your METAL as a validator! You can track the progress and view the estimated rewards on the EARN tab > View Rewards button at any time.
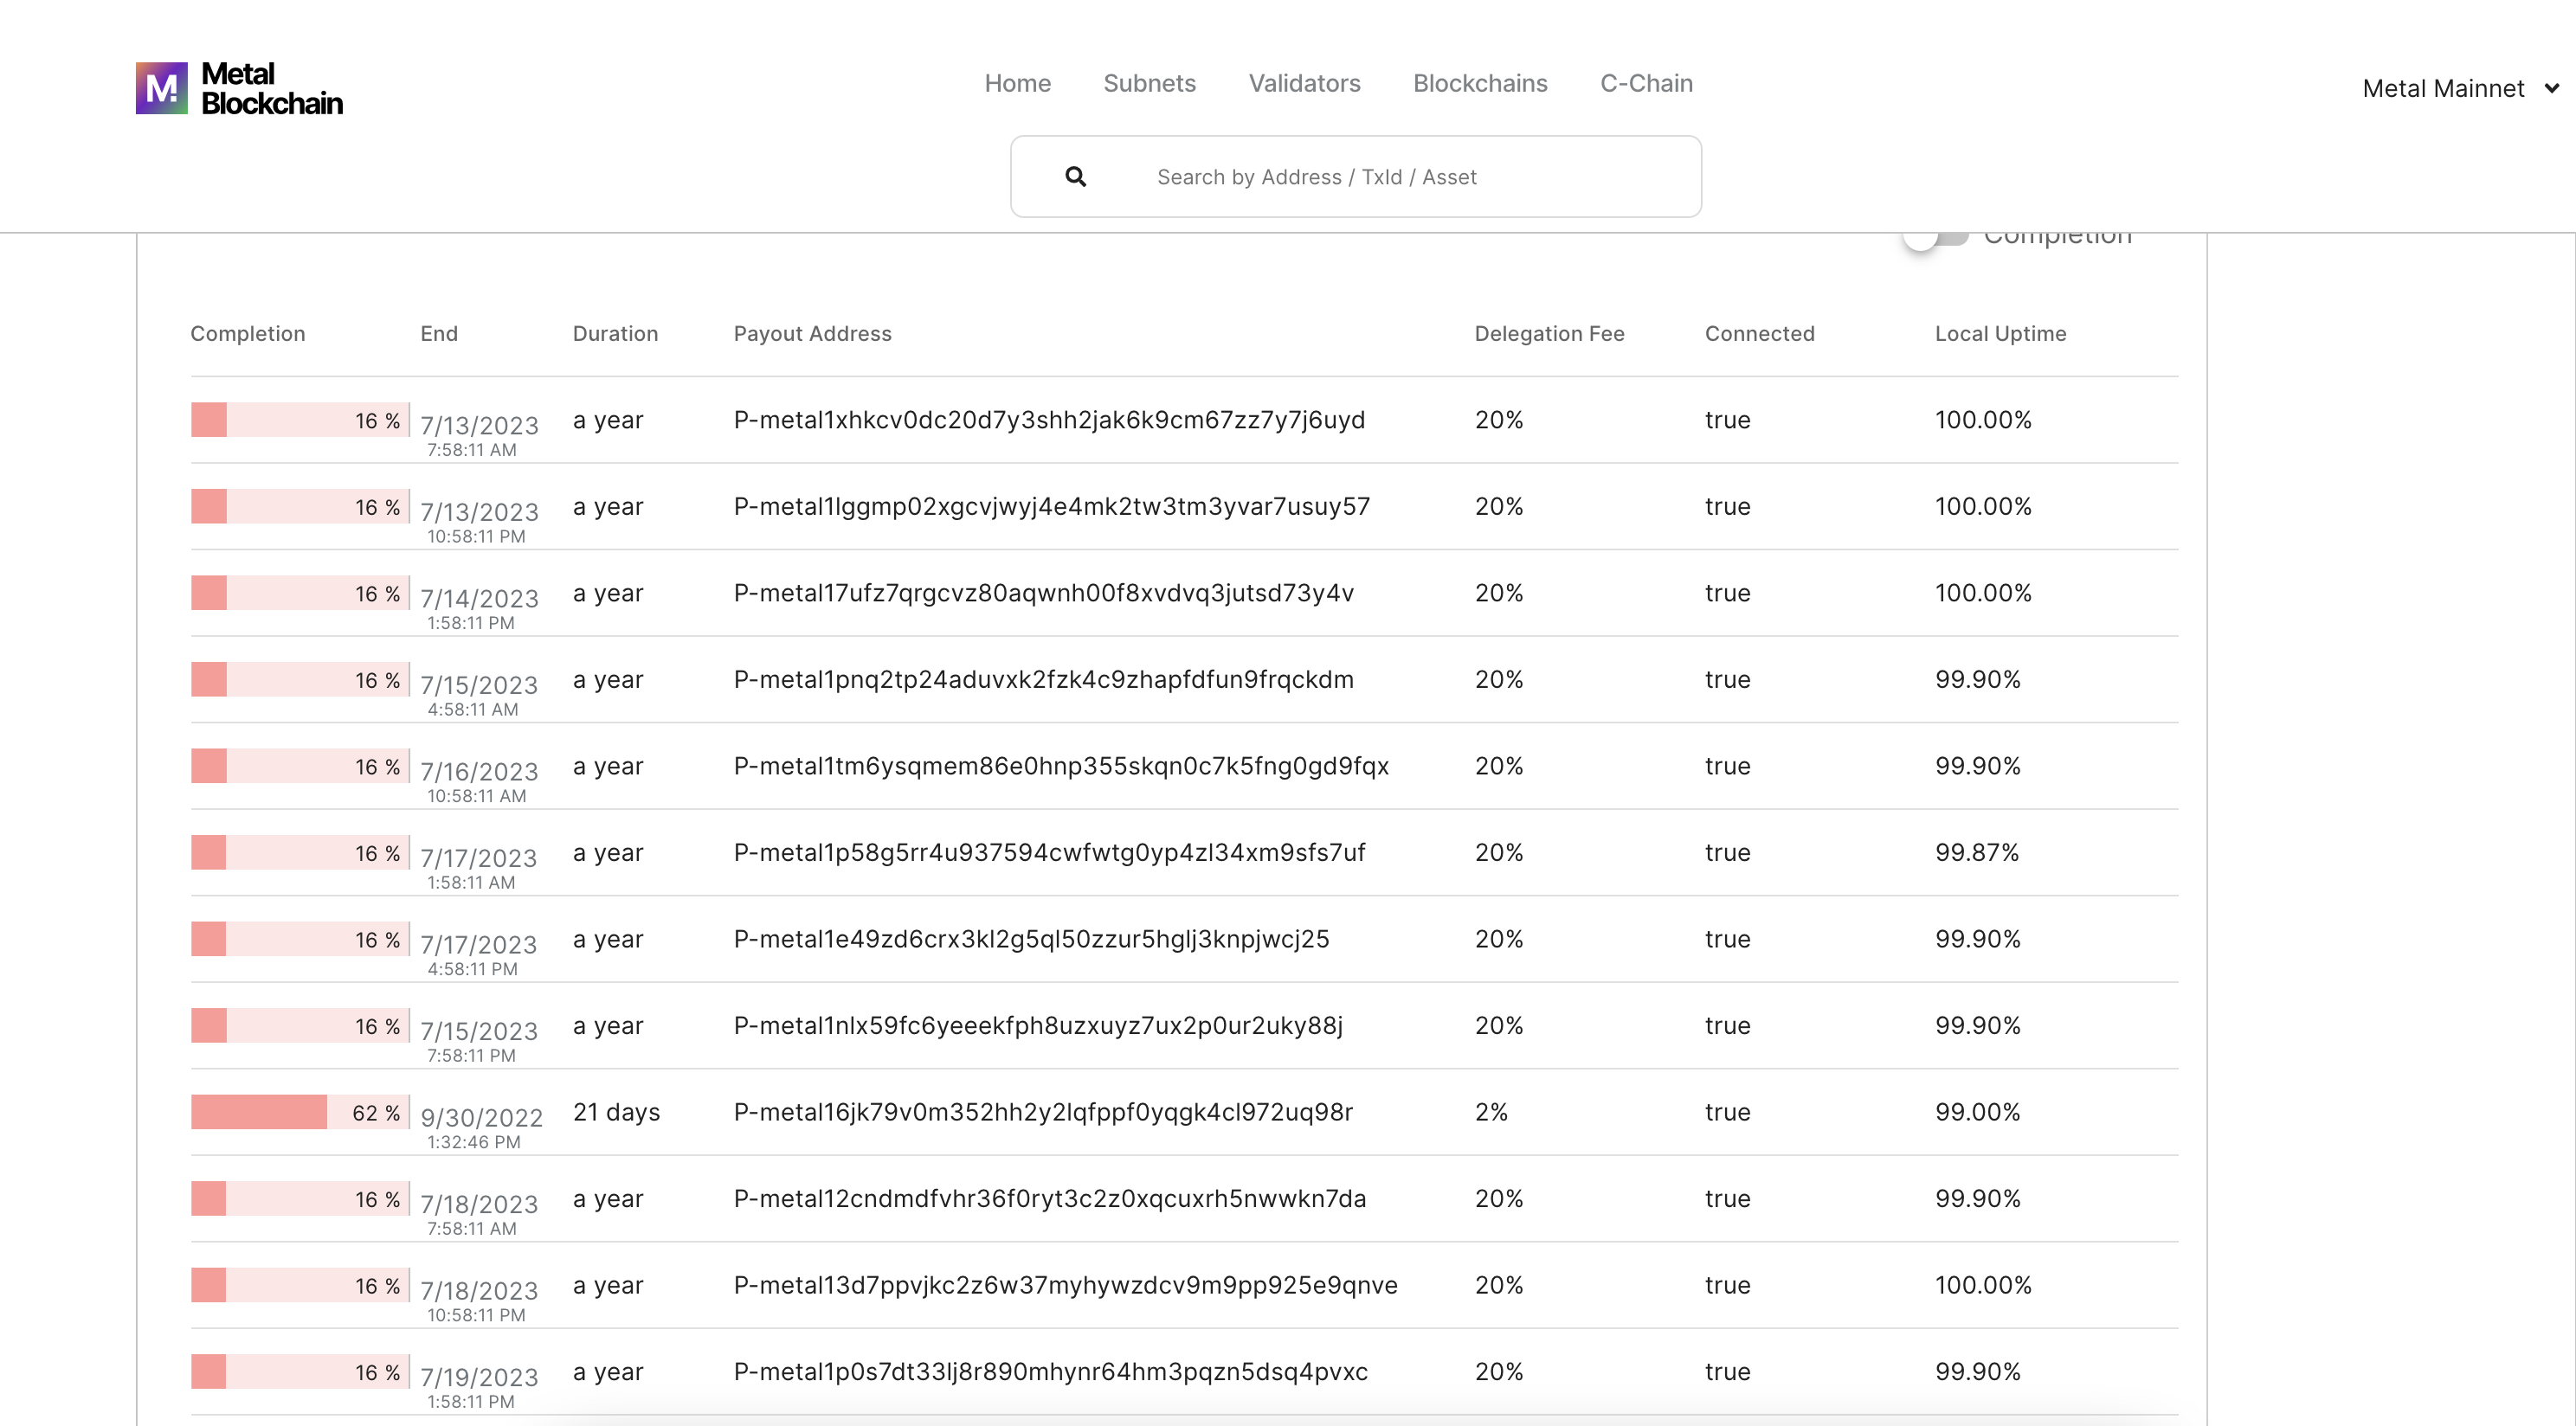
Important: If you don’t meet 80% uptime at the end of his staking period, the validator nor its delegators will be able to earn staking rewards. You can track validator uptimes here, in the local uptime section as seen in the picture below.

Alternatively, you can always check your uptime by entering the following command in the terminal:
This concludes the how-to stake your METAL as a validator chapter. Visit the Metal Staking FAQ for answers to your most frequent questions.
Lastly, you’ll want to install monitoring software for your node. So you can monitor uptime, machine metrics, and much more.


